In this section, we’ll show you how to integrate DaisyUI with Tailwind CSS in Django 5. Before you begin, make sure you’ve installed and set up Tailwind CSS in your Django 5 project.
Step by Step How to Add Tailwind CSS 3 to Django 5
1. Use DaisyUI Django Via CDN
Access Tailwind DaisyUI via CDN Simply include one of these in the <head> tag of your HTML. Avoid CDN files for production; they can’t purge unused styles and increase file size. However, CDN files are suitable for small or short-lived projects personal portfolio websites.
{% load static tailwind_tags %}
<!DOCTYPE html>
<html lang="en">
  <head>
    <meta charset="UTF-8" />
    <meta name="viewport" content="width=device-width, initial-scale=1.0" />
    <title>Integrating Tailwind CSS 3 with DaisyUI in Django 5 Using CDN</title>
    {% tailwind_css %}
    <!-- <script src="https://cdn.tailwindcss.com"></script> -->
    <link href="https://cdn.jsdelivr.net/npm/[email protected]/dist/full.min.css" rel="stylesheet" type="text/css" />
  </head>
  <body>
    <div class="flex justify-center items-center h-screen flex-col">
      <h1 class="text-4xl text-green-500 text-center mt-20">
        Add Tailwind CSS 3 with DaisyUI to your Django 5 project via CDN.
      </h1>
      <div>
        <button class="btn btn-active">Default</button>
        <button class="btn btn-active btn-neutral">Neutral</button>
        <button class="btn btn-active btn-primary">Primary</button>
        <button class="btn btn-active btn-secondary">Secondary</button>
        <button class="btn btn-active btn-accent">Accent</button>
        <button class="btn btn-active btn-ghost">Ghost</button>
        <button class="btn btn-active btn-link">Link</button>
      </div>
    </div>
  </body>
</html>
2. Install DaisyUI Django Via NPM
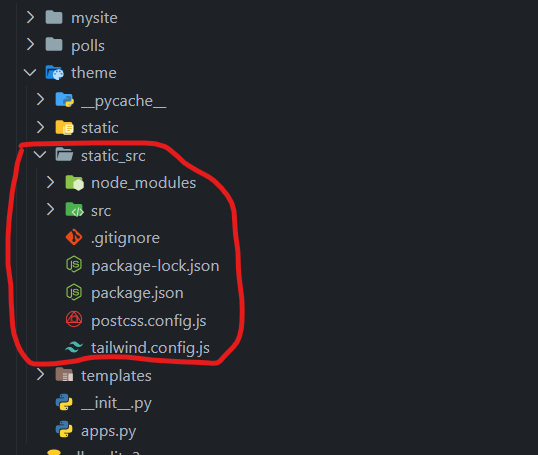
Installing DaisyUI via npm in Django can be a bit tricky. You’ll first need to install and set up Tailwind CSS 3 with Django 5. You can refer to the previous article or consult the Django-Tailwind documentation for guidance.
First you need to move theme directory.
cd mysite/
cd theme/
cd static_src/ 
Now Install daisyUI via npm.
npm i -D daisyui@latestNext, include DaisyUI in your tailwind.config.js file:
module.exports = {
  //...
  plugins: [require("daisyui")],
}
To start Django Tailwind, run this command.
python manage.py tailwind start
# or
python manage.py tailwind build
Now, add DaisyUI button components into your Django project and test them.
{% load static tailwind_tags %}
<!DOCTYPE html>
<html lang="en">
  <head>
    <meta charset="UTF-8" />
    <meta name="viewport" content="width=device-width, initial-scale=1.0" />
    <title>Install Tailwind CSS 3 with daisyui in Django 5</title>
    {% tailwind_css %}
  </head>
  <body>
    <div class="flex justify-center items-center h-screen flex-col">
      <h1 class="text-4xl text-green-500 text-center mt-20">
        Install Tailwind CSS 3 with daisyui in Django 5
      </h1>
      <div>
        <button class="btn btn-active">Default</button>
        <button class="btn btn-active btn-neutral">Neutral</button>
        <button class="btn btn-active btn-primary">Primary</button>
        <button class="btn btn-active btn-secondary">Secondary</button>
        <button class="btn btn-active btn-accent">Accent</button>
        <button class="btn btn-active btn-ghost">Ghost</button>
        <button class="btn btn-active btn-link">Link</button>
      </div>
    </div>
  </body>
</html>
Saim

Hi there! My name is Saim and I’m excited to dive headfirst into the world of Python Django. I’m eager to learn and grow every step of the way, and I’ll be documenting my journey through blog posts. I’ll share the highs, lows, and everything in between with you. Together, let’s uncover the wonders of Python Django and its endless possibilities in web development.

